So there is now a rather large cooker sitting in my hallway waiting for the electrician to come in later to wire it up.
On one hand i'm quite excited because i've wanted a new cooker for ages... but on the other a bit scared as I've never had electric before. I've always cooked with gas, my Mum always cooked with gas... so i've got no idea about heat conversions, lol. There may be a few burnt dinners on the horizon... hmmn... wonder if I could convince Carlo that he'd be better than me at managing the switch.....? ;-) We'll have to see.
Not a lot on the scrappy front, I'm still a bit down about the fuji to feel like doing much, tbh. I did do a tutorial on it's a creative world, on Spot Colouring in PSE, which i've popped on here too. I'm doing an 8.5 x 11 album of simple pages of our holiday this year, and this is the first. I like to keep holiday albums quick and simple with the emphasis on the photos so I can get them done quicker, which is the same reason i've chosen a smaller format. I have so many pics I want to use and I can save money by printing smaller photos too.
SPOT COLOURING IN PSE
Open the photograph you plan to work with in your photo editing program. I use PSE4, so my instructions are for that, however, most programs operate similarly, so with a little tinkering you should be able to work out how to do it if you use another kind.
Having opened your image, the first thing to do is make a duplicate copy. Make certain the two images are the exact same size, dpi etc. To do this, check in the bottom left hand corner of the photo box, where you can see, and alter the document dimensions. Set each photo to a manageable size, say 40%, and make sure the dpi is the same for both.
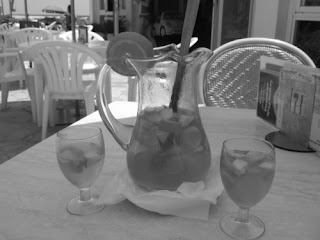
Make certain you have a back up of the original before you go any further, and then convert one copy to mono. In PSE, I do this by going to Enhance -> Adjust colour -> Remove colour.
.jpg)
.jpg)
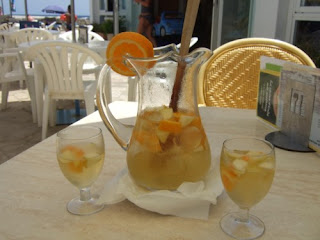
If your photo looks washed out (as above) , have a play around with the levels, contrast and lighting controls until you’re happy with the black and white image....
.jpg) (A much more punchy version, above)
(A much more punchy version, above).....then cascade your windows, so you have two images open at once. One will be your colour photo, and one will be the mono version.
Hover over your command buttons until you locate the ‘move’ tool. These will most likely be down the left hand side of your screen and the ‘move’ tool will look like a pointer with a small cross to the right of it. Click on the ‘move’ button and use the mouse to drag and drop the mono image directly over the colour image.
You can now magnify the image by zooming in, and use the ‘eraser’ tool to ‘rub out’ the sections where you want colour to show through. The ‘eraser’ is on the same tool bar as ‘move’ and actually looks like a rubber so shouldn’t be too difficult to find.
Although you do have to take a bit of care to make sure you don’t remove anything you don’t want to, it’s a really easy technique, and it’s great fun watching the colour coming up. Do you remember those old ‘magic’ painting books you used as a kid…? Well, it’s a bit like that but less messy! lol!
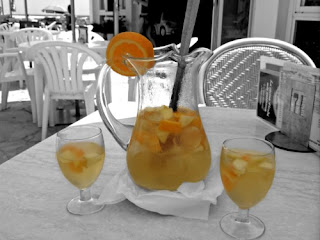.jpg) (Picture after technique applied)
(Picture after technique applied)In order to make your eraser larger or smaller, look above the image you’re working on and you’ll see the ‘eraser’ and close to it, a box indicating size. Just use this to make it small, tiny or bigger as you need – peasy!You will want to merge/flatten the completed image before saving and printing.And don’t forget to keep a back up of the original - just in case!!
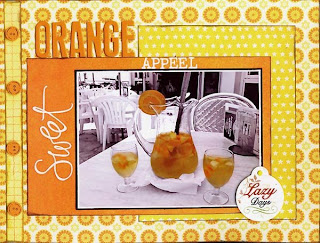 (Excuse the silly play on words - I don't know what I was thinking of! )
Have a great day!
jake xxx


